Talbot Express Leaf Spring Replacement Guide / Thoughts / Prayers
Due to a rather saggy rear end coupled with a fair amount of roll going round corners I decided to replace the leaf springs.
I considered adding leaf spring assisters; the ones from Custom Campers look excellent: https://www.customcampersuk.co.uk/coil-spring-assisters/
However I've become a bit obsessed with keeping the old girl standard so want to make sure that she has good solid leaf springs before the real tinkering begins.
In retrospect the springs I took off weren't too bad, they probably could have been bolstered by some assisters and been ok.
I installed the five leaf variety from Jones Springs: www.jones-springs.co.uk Fast delivery and very good quality. They came with U bolts, nuts and bushings. I got some replacement fasteners from a local hardware store (8.8 grade, of course).
Phyllis is a 1992 Talbot Express Autosleeper Executive; so not a panel van or Alko chassis - the job will be a bit different for those vans I believe.
Here's a link to the Russek manual. It describes the job with a beautiful simplicity and misses out some of the finer details that one may face when taking bits off a 25+ year old van. http://bit.ly/talbotleaf
Here is how I did the job - it may be a bit long winded and definitely a lot slower than a garage would do it but I did it on the drive, dodging the March rain.
Tools used (not comprehensive) (sorry if I'm telling Grandma how to suck eggs):
- Good quality high load axle stands and jack (ideally two jacks). Don't let a three tonne van drop on your head. Even better would be some sort of lift but if you've got one of those I doubt you'd be reading this.
- Penetrating fluid. I used PlusGas but use whatever you can get your hands on.
- Sockets, spanners, impact wrench (doable without but a lot easier with). 22mm, 24mm, 17mm, 19mm. Handy if you have these in the deep variety as well.
- Breaker bar: Some of the bolts are going to be very tight.
- Blowtorch - maybe not essential. (more on this later)
- Big f**king hammer
- Pry bars
- Torque Wrench/es with range 48nm to 146nm.
- Red rubber grease and anti seize compound of some sort.
Removal:
Preface - in the weeks / months / years / decades leading up to the job it might be a good idea to start soaking some of the bolts you're going to remove in a penetrating fluid of your choice. If anything it'll make you feel better.
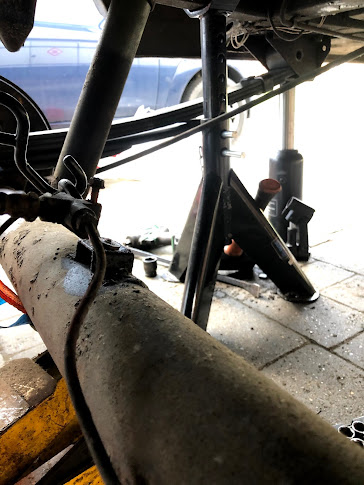
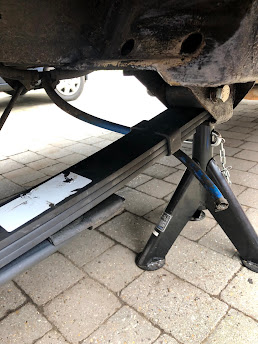
1) Loosen wheel nuts, jack up the rear of the van and place two axle stands under the chassis. Put something else under the van as a backup in case the axle stands fail. Make sure it's properly supported before you start clambering around underneath it.
2) Choose which side you want to start with and remove the wheel.
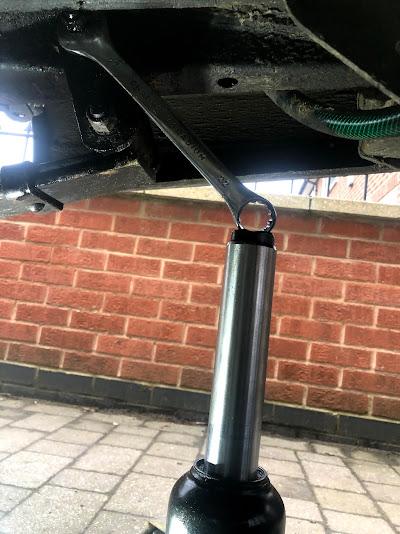
3) Place a jack under the axle on the side you wish to tackle first and take the weight of the axle.
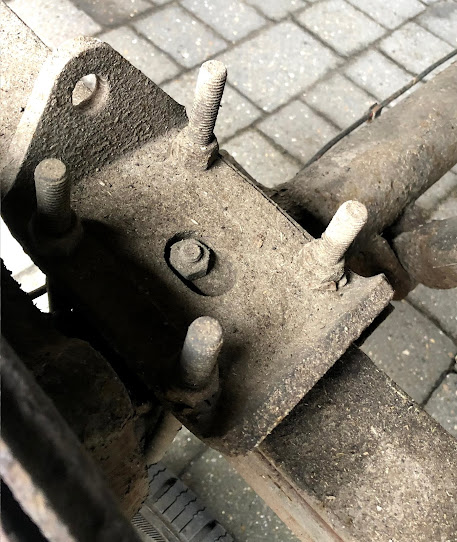
4) Undo the 19mm nuts on the U bolts and remove the U bolts. You'll need a deep socket to do this. Make a note of which way round the thick steel plate goes for later on. They might need a bit of breaker bar action to crack loose but shouldn't be too bad. Or set your impact to destroy and let rip. If you don't have replacement U bolts be careful not to damage the threads.
6) At the front of the spring remove the 24mm nut and easily slide the bolt out of the bushing in the leaf spring. That might have worked in 1992 but chances are it's seized into the bushing. Options here are:
- Use an angle grinder to cut the bolt out. This is probably the quickest way, just be aware there's not much of a gap and a decent potential for the angle grinder to catch and whip an arm off.
- Whack the bolt with a big hammer until it starts to free then get an impact wrench on it and simultaneously whack / turn the bolt, hopefully it'll come out.
Also, the 24mm nut will be tight and will need some aggression to crack loose.
7) Now you need to remove the complete rear spring hanger. It's held on with four 17mm bolts. There's a very high chance that these are covered in rust and seized in place. Go at these with caution. Looking back at the job I wish that I'd given them some heat before starting them to break free some of the rust. If you do this just make a mental note of where the gas pipes are running and have a fire extinguisher nearby.


The leaf spring bolt fits in a little recess at the top of the axle so it will need to be lifted out of there.
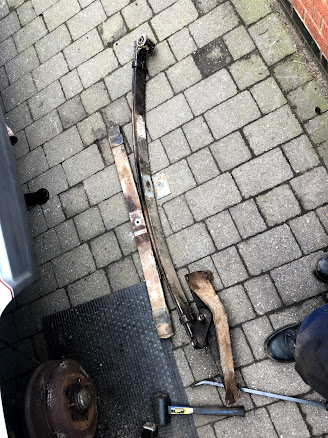
9) With the spring removed you can now remove the shackle assembly. Hammer time - being very careful not to damage the threads on the bolts - those shackles are very hard to find.
10) I wire brushed and spray painted the hangers to give them another three days of rust protection. If you find that it's badly rusted they can be found online for about £110 each.
11) Assess the condition of the bushing that fits into the hanger and whether it'll come off the shackle bolt. Replace at your peril as required.
12) Maybe use this opportunity to clean all the mud from the bottom of the van which is normally obscured by suspension parts. If you want to go to town you could wire brush it back and get some paint in there.
Refitting:
Note on lubricating bushings: For the all rubber bushing use red rubber grease - it won't damage the rubber, and for the front bushing put some anti seize grease on the bolt - hopefully it'll stop the bolt from seizing into the bushing.
1) The bushings are slightly different at the front and rear of the spring. The front bushing has a metal tube in the middle and thankfully was already installed when we got the springs.
2) Fit the bushing into the rear of the spring - hopefully this came with your springs.
3) Fit the shackle onto the hanger It might need some gentle persuasion with a hammer. Put the metal plate on then the nut on but don't tighten it up.
4) Now you're going to bolt the hanger back on to the chassis. It needs to be lined up (according to the manual) with a 12mm and 16mm 'drift'. I just used an M12 and M16 bolt I had lying around.
Evenly tighten the four 17mm bolts to 36ft lbs (48nm) ish.
5) Get your shiny new leaf spring and wrestle it into place, ideally with a helper. I found it easiest to get it on the rear shackle first then persuade it into place at the front with a lump hammer and a jack. Put the bolt in the front hanger and put a nut on it but don't tighten it up.
Make sure it's properly lined up with the axle - i.e. the bolt holding the leaves together fits into the recess on the axle.
This took me a fair bit of swearing and heaving and beating with a hammer to get it lined up properly.
6) Put the U bolts under the axle and refit the thick steel plate making sure it's the correct way round. Put the 19mm locking nuts on but don't tighten them.
7) Now jack up the axle so that the whole thing is under tension (careful not to lift the van off the axle stands).
Make sure it's all nice and straight and evenly tighten the U bolt nuts to 58ft lb (78nm) ish.
The manual states to load the vehicle so that gap h is 'exactly' 107mm.
I hope this helps some people out there and hopefully now you've lost your sagging rear end and have a lovely pert behind.







Great stuff.
ReplyDeleteI will be replacing mine soon, but I’m a kid of the 70s, never thought I’d be messing about with this stuff again, but looking forward to it.